PORK SAUERBRATEN

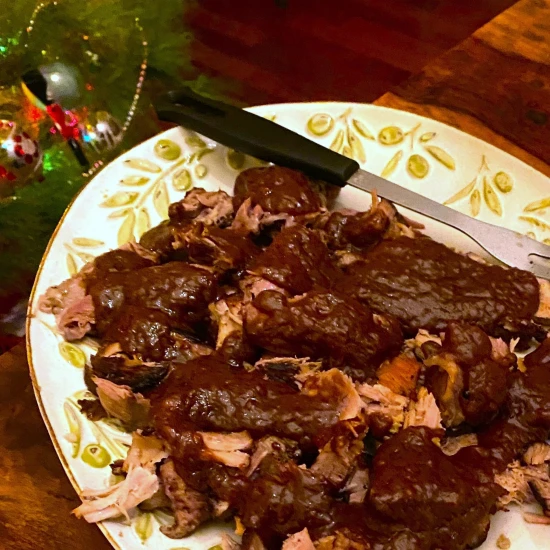
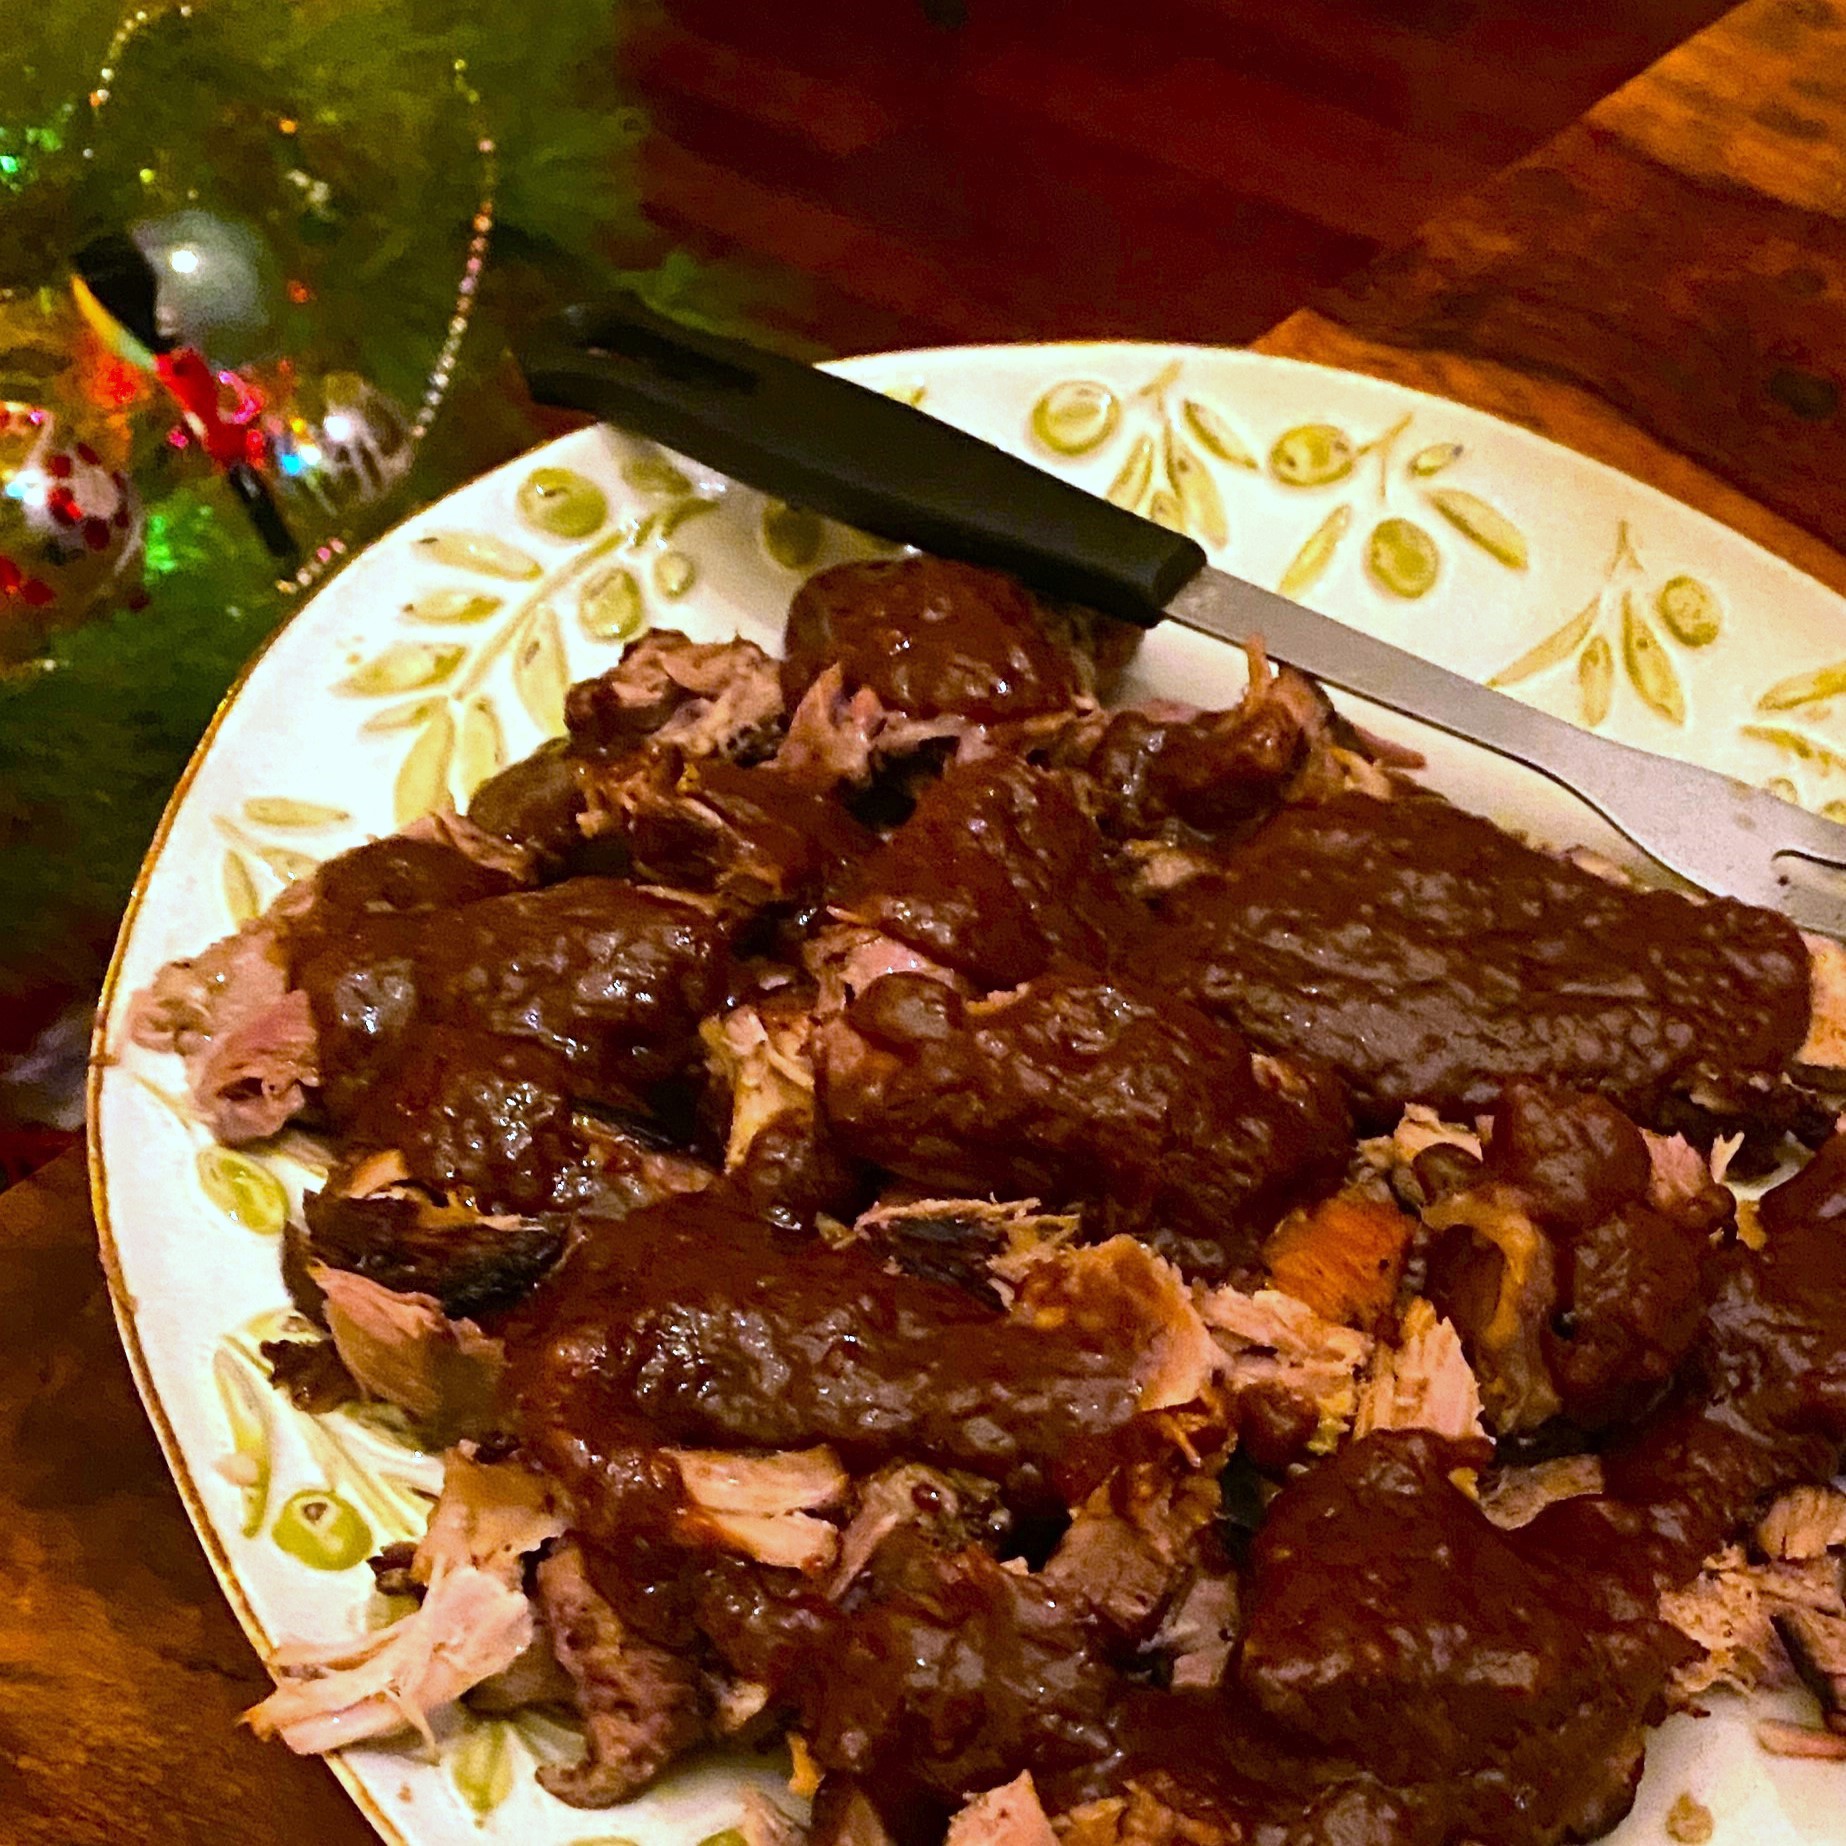
A platter for pork saurbraten smothered with sauce

I don’t usually post entree recipes from the holidays – simply because my ravenous family would never allow me the 15-20 minutes needed to arrange, style, light, and photograph a good “hero” shot of our succulent roasted beast. Mr. M snapped a few candid pics this year just before we sat down to devour our feast, so please forgive the photo quality.

TODAY’S RECIPE:
We’re pork eaters in my family (Schweinefleischessers in German). Yes, we eat beef, but we looovveee our pork.  During Thanksgiving, we were chatting about what I should make for Christmas Eve dinner and my sister said,“Make a pork roast.“ Well, I make a simple pork roast with onions and apple cider almost every year for Christmas Eve dinner and wanted to cook something a little different this year. I remembered my mother’s beef sauerbraten recipe and wondered if it could be adapted for pork. (Actually, what I remember is the gingersnaps used to thicken the sauce – and eating the leftover cookies.) In theory (according to Google), pork sauerbraten exists, yet I couldn’t find a recipe – so I created my own version here.  It has the flavor of Sauerbraten, yet the meat is succulently moist. If you are a Schweinefleischesser like us, you may want to give this recipe a try. We served ours with my mother’s spaetzle recipe.

PORK SAUERBRATEN
This is a traditional German Sauerbraten recipe using pork rather than the expected beef.


Ingredients

    MARINADE
  • Approximately 3 lbs. pork shoulder
  • 2 cups red wine
  • 1 cup red wine vinegar
  • 3 shallots, peeled and sliced
  • 3 bay leaves
  • 2 Tablespoons mustard seeds
  • 1 Tablespoon black peppercorns
  • 1 Tablespoon coriander seeds
  • 1 Tablespoon brown sugar
  • 1 teaspoon juniper berries
  • 1 teaspoon allspice berries
  • 1 teaspoon caraway seeds
  • 1 teaspoon Kosher salt
  • ½ teaspoon whole cloves
  • ROAST
  • 1 celery stalk, diced
  • 2 large carrots, diced
  • 1 leek, cleaned very well and diced
  • 1 Tablespoon tomato paste
  • 2 cups beef stock
  • 8 gingersnaps
  • cornstarch or roux, if needed

Directions

  1. Marinate the meat (3 days in advance): In a large container with lid, stir together all marinade ingredients, then submerge pork in marinade. If not submerged, top off with a little extra wine if needed. Place in the fridge and marinate for 3-4 days, turning daily.
  2. Cook: Preheat the oven to 350°F. Remove the pork from the marinade and pat dry with paper towels. Pour the marinade through a sieve and reserve 2 cups for the sauce.
  3. Heat oil in a Dutch oven or large heavy saucepan. Brown meat well on all sides over medium-high heat. Remove from the pan and set aside. Add more oil to the pan, if needed, then add the celery and carrots. Cook over medium-high heat for about 7 minutes until beginning to soften, then add the leek and cook an additional 2 minutes.
  4. Add the tomato paste to the pan and sauté until beginning to brown. Add the beef stock and 2 cups of the drained marinade to the pan and scrape up any browned bits. Bring to boil and remove from heat.
  5. Add meat to pan, including any resting juices. Cover and braise in the oven 2-2.5 hours until fork tender.
  6. Remove pork from pan and let rest. Strain the cooking liquid into an oil separator (if needed). Pour liquid into a saucepan, stir in the crushed cookies and simmer until cookies are dissolved. If the sauce needs to thicken further, stir cornstarch into a little cold water to make a slurry and add to the sauce or add roux. Simmer until thickened. Taste sauce and adjust seasoning with salt, pepper, and a splash of red wine vinegar. Slice pork and smother with sauce, serving with more sauce on the side.

Thai Peanut Chicken Rice Bowls

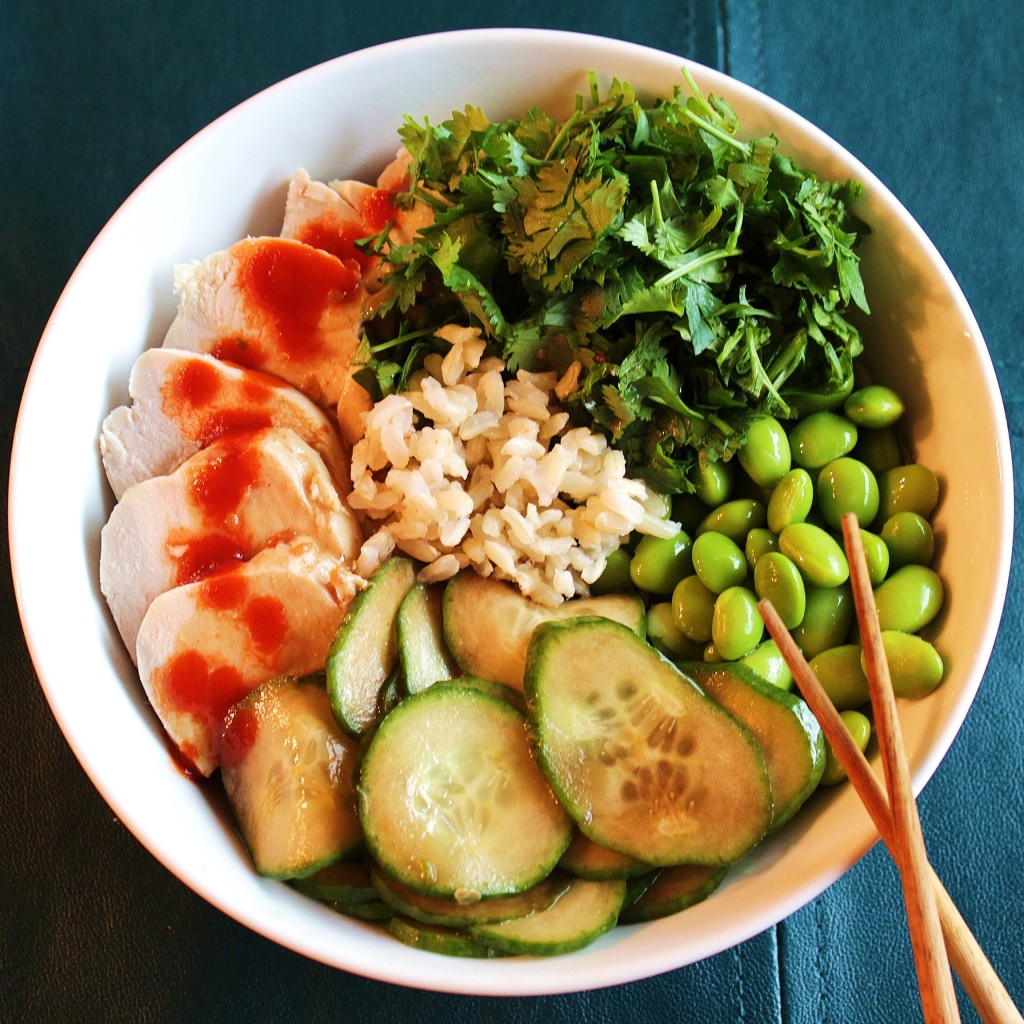
A white bowl with composed salad and chopsticks

Today’s Musings:
It’s a new year and time to shove 2020 out the window, welcoming a fresh start.  The following handful of posts are a series, written a lifetime ago, that track my journey from a painful breakup with a man I adored, to the shock of discovering the truth behind his mask, to glimpsing the depths of his depravity, and finally acknowledging my own error in blindly trusting him.  This tale ended long ago, but only now am I ready to disclose it – and perhaps help others who find themselves in a similar situation. Thank you to those who shared evidence and convinced me to tell my story.

The Final Chapter

“First it hurts, then it changes you.”
– unknown

When you begin researching covert narcissists and realize you’ve endured this form of emotional abuse, the first descriptor you’ll likely come across is “victim.”  “Emotional abuse” and “victim” – those two words punch you in the gut and knock the wind out of you. When you first hear the V-word, your blood may freeze in your veins; you’ll most likely be in disbelief.  The tough, female warrior inside you may scream, “That’s not ME. I am not a victim!” Yet, this word clings to you, like the sour smell of booze after a night of too much drinking.  In our world, victims are seen as weak, helpless, unwilling to take responsibility for the role, however small, they may have played in this reprehensible charade.  No one wants to be the victim, but that’s what you are.  You unwittingly gave yourself to a con-man, an emotional con-man, who never cared about you, never loved you, and only saw you for what he could “get” from you – nurturing, sex, status, or money – each of these creatures is looking for something different to feed their ego. It is a disorder and this sickness makes him incapable of significantly bonding with anyone – even fabulous you. 

This will be the most difficult concept for you to comprehend – no matter what he whispered in your ear, no matter how sincere he sounded in the moments when he gazed into your eyes, no matter how many little kindnesses he did for you, it was all an act; he never cared about you. You’ll want to hold on to these little moments as “proof” that you made him feel something, but they are lies.  In his world, you are not special – you are replaceable, something to be used up, like a tube of toothpaste. The charming, good-guy mask he’s been wearing can only stay in place for so long. Finally, it will slip and you’ll be left hurting, alone, and profoundly confused. Where did Mr. Wonderful go? With the final discard, you will feel his tangible lack of empathy or remorse – when he is done with you, he is DONE. 

As you learn more – and you will – researching what just happened to you is part of the process victims of narcissists go through –  watching YouTube, reading books, listening to podcasts, joining Facebook support groups, maybe even talking to a Therapist – you’ll begin to hear the word “survivor.”  Survivor sounds tough, strong, invincible. Being labeled a “survivor” provides hope.  At first, you’ll think it’s just a dolled-up euphemism for “victim,” that shameful stench that still swirls around you.

So, are you a victim or a survivor? 

You are both.  The language we use has significant impact on how we view ourselves and how the world views us.  The word “victim” focuses on what has been done to us and, in the beginning, this is unfortunately where we need to focus.  A victim has been damaged and mistreated; they are defined by the pain that has been heaped upon them by the narcissist. Their strength and resilience has been assaulted and may even feel non-existent.  Victims are divorced from their power.  On the other side of this trauma is where the survivors dwell – and you will make it to the other side.  Survivors acknowledge the abuser for the pathetic creature he truly is. We’ve processed the disbelief, the hurt, the anger, the realization that people like this actually exist. We recognize that narcissists are incapable of feeling loving emotions and acknowledge our humiliation that, for all our savviness, we fell for their con.  A survivor moves forward, stronger and changed.  We not only continue to live, but we grow and prosper, sharing our human emotions the narcissist can only fake. As survivors, our power is reclaimed, and the narcissist, for us, shrivels into nothing and dies.

Today’s Recipe:


Thai Peanut Chicken Rice Bowl


Ingredients

    Cucumber Salad
  • 1 cup cucumber, thinly sliced
  • 2 Tablespoons green onions, thinly sliced
  • 2 Tablespoons rice wine vinegar
  • 2 teaspoons soy sauce
  • 1 teaspoon sesame oil
  • ½ teaspoon sugar
  • ⅛ teaspoon salt
  • Peanut Dressing
  • ¼ cup bottled peanut sauce
  • 2 teaspoons rice wine vinegar
  • 1 teaspoon sesame oil
  • Rice Bowl
  • 1 cup cooked brown rice
  • 1 cup edamame, sprinkled with salt
  • 1 cup cooked chicken breast, thinly sliced
  • 1 bunch cilantro, roughly chopped
  • Sriracha Sauce (optional)

Directions

  1. Make cucumber salad: Combine all ingredients and let marinate for at least 30 minutes.
  2. Make peanut dressing: Whisk together all ingredients.
  3. Divide rice between four bowls. Arrange edamame, chicken and cilantro on top of rice. Add marinated cucumbers.
  4. Drizzle with peanut dressing and sriracha, if using.

Classic Apple Pie

Sometimes, you can’t improve on a baked-from-scratch classic, like this Apple Pie. Apples, flaky pastry, and a bit of cinnamon is all that’s needed…except maybe a scoop of ice cream.

Apple Pie from Scratch

I was scrolling through Facebook yesterday and came across two videos of recipes being prepared in fast-motion. They weren’t special recipes – one was carrot cake and other was banana bread. I was astonished to realize the banana bread recipe had received over 8 million hits. Eight…million…hits – for banana bread. My blog is over 10 years old and I haven’t reached 8 million hits total, let alone for one post.

I have online presence envy.

The truth is that I’ll probably never have 8 million hits for a post. Those videos are for people who want a recipe that’s fast…and easy…with as little fuss as possible…and doesn’t require a special pan or spice…and results in something the whole family will love. Those videos are for what I call “Everyday Cooks.” You know who they are. After a full day at work, these folks are expected to arrive home and whip up something soul-satisfying and delicious day after day after day. God bless them. I could never do that – it would suck the joy of cooking right out of me.

Instead, I write for the food enthusiast, culinary explorers who learn about different cultures through preparing and eating their food, who are enamored by new ingredients or cooking techniques, and are willing to sacrifice gluten sensitivities and sugar phobias for the perfect slice of homemade apple pie. We relish the fuss – handmade crusts, apples harvested from the garden. We are a special breed, our numbers are small, but our passion is deep.

For my fellow enthusiasts…


Classic Apple Pie

  • Servings: One 9” pie
  • Print

This crust recipe, my favorite and from The Pioneer Woman, makes three crusts. Not sure what to do with the extra crust? Freeze it and use it for a single-crust pie later.


Ingredients

    FILLING
  • 4-5 apples, peeled, cored and thinly sliced
  • ¼ cup brown sugar
  • zest from ½ lemon
  • Juice from ½ lemon
  • ½ teaspoon cinnamon
  • ¼ teaspoon nutmeg
  • ⅛ teaspoon salt
  • CRUST
  • ½ cup unsalted butter
  • 1 cup Crisco
  • 1 large egg, beaten
  • 5 Tablespoons cold water
  • 1 Tablespoon white vinegar
  • 3 cups All-purpose flour
  • 1 teaspoon salt
  • 2 Tablespoons Panko breadcrumbs
  • 1 Tablespoon unsalted butter, cut into small pieces
  • 1 large egg, beaten
  • 1 Tablespoon sugar, preferably turbinado, like Sugar in the Raw

Directions

  1. In a medium bowl, combine apples, brown sugar, lemon zest, lemon juice, cinnamon, nutmeg and salt. Toss to coat. Set apple filling aside.
  2. Chill butter and Crisco until very cold by placing both in the freezer for 15 minutes. Meanwhile, combine egg, water, and vinegar in a small bowl and set aside. Place flour and salt in the bowl of a food processor. Add butter and Crisco to flour and pulse on/off until mixture resembles coarse meal (you can also combine the flour and fats using a pastry blender if you don’t want to drag out your processor – more effort, less clean-up). Scrape mixture into a large bowl, add egg mixture, and stir until combined. Don’t overwork dough.
  3. Separate the dough into thirds (If you prefer a more substantial crust, separate in half) and roll into balls. Wrap each ball in plastic wrap and freeze for about 15 to 20 minutes to chill. (If you will be storing the dough in the freezer for a longer period, form dough into a disk and seal in a Ziplock bag. Thaw 20 minutes before using).
  4. Preheat oven to 375⁰. Sprinkle crust with a bit of flour and then, in between two sheets of waxed paper, roll out the bottom crust, starting at the center and working your way into a 11” – 12” circle. Once the dough is the correct size, peel off the top layer of waxed paper and, using the bottom sheet, transfer the dough to a 9” pie pan. Flip the dough over, peel off the bottom sheet, and gently press the dough into the pan. Go around the pie pan tucking the dough to make a clean edge. Freeze until second crust is rolled out. Roll out the second crust into a 12” circle between two sheets of waxed paper and transfer to freezer until ready to use.
  5. Remove the bottom crust from the freezer. Sprinkle with panko crumbs (this helps avoid a soggy bottom crust). Fill with apple mixture, but do not include any juice/liquid that may have accumulated at the bottom of the bowl; Dot filling with bits of unsalted butter. Remove top crust from freezer. Peel off top sheet of waxed paper, flip crust on top of filling, and trim top pie dough so that overhang beyond the pie plate lip is only about 1/2-inch. Tuck rim of dough underneath bottom crust and crimp decoratively. Cut a few decorative vents on top of pie. Transfer pie to a baking sheet and brush with beaten egg and sprinkle with turbinado sugar.
  6. Bake at 375° for 50-60 minutes or until crust is brown and filling is bubbly. If edges brown too quickly, cover edges with foil. Cool completely on a wire rack.

After 8 Mint Chip Gelato

Mint Chip Gelato Recipe
I’m an autumn girl. This favored season of mine showers me with crisp sweater weather, falling crimson leaves and cozy fires that align with my introvert’s sensibilities. And I cannot forget autumn’s bounty of rib-sticking roasted meats, soups and stews that beckon my German sensibilities as well. And yet, I bask in the first few weeks of summer – perhaps even more than autumn. Summer’s constant sun soaks through my tired flesh and warms my very soul. Birds sing the song of summer throughout the trees during the day while crickets serenade the night away, calming me. The longer days encourage my evening walks and dining alfresco – the TV is left silent. And my kitchen is inspired by summer’s bounty of sweet corn, ripe tomatoes, juicy nectarines and, of course, freshly made gelato.


After 8 Mint Chip Gelato (Version 2)

  • Servings: 1 ½ quarts
  • Print
This is my post-gelato school updated version of a 2012 recipe. Measurements are in grams.

Ingredients

  • 500 grams 2% milk
  • 1 bunch fresh mint leaves, washed, patted dry and lightly packed – about 2 cups
  • 145 grams sugar
  • 16 grams corn syrup
  • 1 gram salt
  • 38 grams powdered milk
  • 1 gram guar gum
  • 1 gram carob
  • 250 grams heavy whipping cream
  • 2 grams vanilla
  • 1 package chocolate dinner mints, chopped (such as Andes) – about 1 cup

Directions

  1. Heat milk to 104 degrees. Remove from heat, add ¾ of mint leaves, stir, cover and let steep for 1 to 1 ½ hours. Strain mint, pressing to extract as much mint oil as possible. Re-warm milk mixture. At 104 degrees, add sugar, corn syrup and salt. Continue heating and stirring milk mixture. At 144 degrees, add powdered milk mixed well with guar gum and carob. Heat milk to 194 degrees to pasteurize and immediately remove from heat.
  2. Cool milk mixture in ice bath, adding cream and vanilla when mixture’s temperature is reduced to 144 degrees. Add remaining 1/4 of mint leaves and emulsify with a stick blender. When mixture has cooled to room temperature, pour through a sieve and refrigerate overnight.
  3. Make gelato in ice cream maker and process according to manufacturer’s directions. Add chopped mints about one minute before gelato is finished.

Mint Chip Gelato Recpe

Quick Apple Sticky Buns

Quick sticky buns

Over 20 years ago, a young woman traveled to Sedona and stayed, on recommendation, at Don Hoel’s cabins. They were a cluster of small cabins near Oak Creek, looking a bit tired, but still cozy and homey, each with a kitchen, fireplace and a separate bedroom.

12 years later, she returned to Sedona and the first lodging she considered was Don Hoel’s. She was disappointed to learn she couldn’t reserve a cabin – the owner was selling and the cabins were closed. She stayed just down the road at Junipine, at a place that was neither cozy nor homey. During that trip, she drove past Don Hoel’s and saw the large “For Sale” sign across the closed gates. Even then, she daydreamed about buying it. The place was big – over 20 acres, with 20 cabins and a market. Her thoughts on the matter stayed in the daydream world.

The woman is back again. The place is now renamed, owned by a young couple for the past 5 years . They’ve polished the place up, adding the much needed character, and turned it into a little gem. The woman, who is not so young anymore, is envious. Again, she thinks “I could do that” and this time she doesn’t consider it just a daydream.


Quick Apple Sticky Buns

I don’t usually use packaged or pre-made products and call them my own, but sometimes busy mornings call for shortcuts. Adapted from Real Simple Quick Sticky Buns.

Ingredients

  • 2 Tablespoons unsalted butter, sliced into 10 pieces
  • 1 medium apple, peeled and grated
  • ½ cup pecans, chopped
  • 3 Tablespoons brown sugar
  • ½ teaspoon cinnamon
  • 1 7.5 ounce tube refrigerated buttermilk biscuits
  • ½ cup powdered sugar

Directions

  1. Preheat oven to 375 degrees. Drop a piece of butter in the bottom of 10 muffin tins. Divide apple among tins and sprinkle with pecans, brown sugar and cinnamon. Top each with a biscuit.
  2. Bake until golden brown, 8-12 minutes. Remove from oven, cover with a baking sheet and flip the tin over. Tap the bottom to release the buns.
  3. Combine powdered sugar with enough water to make a thick glaze. Drizzle glaze on still-warm sticky buns. Serve warm.